Stick Page Forums Archive

The User CP Guide [Forum]

Started by: Paperclip | Replies: 50 | Views: 51,530 | Sticky

Paperclip

Posts: 840
Joined: Nov 2004
Rep: 500

View Profile
Sep 23, 2006 3:32 PM #15802
Private Messaging
Understanding features


The private messaging system on this forum is very useful. It allows members to talk to each other without having to do so in a different form. Although it is slower than an instant messenger, it has all the same features. In this section I will go over with you some features of the private messaging system here so that you may better understand what you can do.

Most of all the features are pretty basic and won't require much description on my part. I hope that you can pick it up quickly and enjoy talking to other members using the messaging system here.

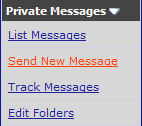
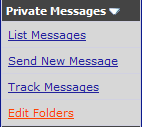
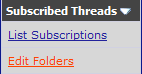
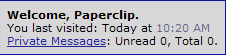
To access your inbox where your private messages are stored you can either click on the User CP link on the navigation bar or you can click Private Messages on the welcome screen.

Example:
Image

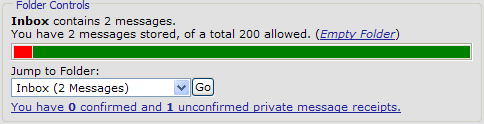
This will take you directly to your inbox. The first thing you will see when you look at your inbox is a bar. Depending on the colors, this bar shows your how full your inbox is.

Example:
Image

Red means how many messages you have in your inbox.
Orange means how many messages you have in your sent items.
Green means how much space you have left.
If the bar is completely red then you have reached your max capacity of messages. This means you will not recieve anymore messages until you empty your inbox. If your friend isn't recieving your private messages, this is the first reason why they probably aren't recieving it.

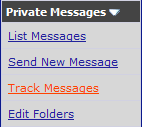
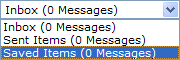
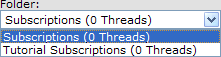
Right under this bar is a scroll down tab that allows your to view the folders you have. The default two you are going to have first are the Inbox and Sent Items.

Example:
Image

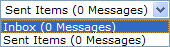
This scroll box allows your to jump from one folder to the next. If you are going to delete messages you have sent in Sent Items you will use this "jump folder" to go to your Sent Items.

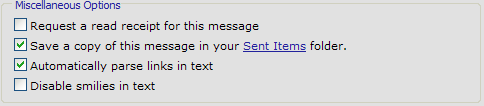
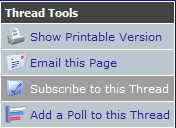
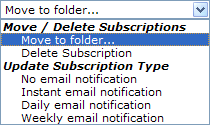
To delete messages you have stored in any folders there is a box with options at the bottom of each folder.

Example:
Image

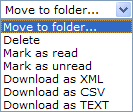
Apart from just being able to delete your messages there are more options that you can choose from.

Move to Folder - once you have selected messages you can choose to move these messages to another folder. This will bring up a new page for you to choose what folder you wish to send these messages to.

Delete - the delete option will delete any of the selected messages you have selected. This cannot be undone.

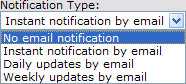
Mark as read - this option allows the new messages sent to you to be marked as read so they don't appear as unread on the welcome screen.

Mark as unread - not sure why you would use this option but if you choose to, all selected messages will be marked as unread and therefore will appear on your welcome screen as having some number of unread messages.

The last three options involve downloading all the messages that you select as three different types of files. The first two file types I wouldn't suggest download for the practical use. Downloading the messages as text however is probably the easiest way and can be used in more ways than one.

So these are the main features of the Private Messaging system here. I hope this was useful to you if you are new to such a system.


Table of Contents


Paperclip

Posts: 840
Joined: Nov 2004
Rep: 500

View Profile
Sep 23, 2006 4:03 PM #15805
Private Messaging
Composing Messages


Okay, so now that you are aware of the features that are in the Private Messaging system let's get down to what you can do in composes and sending new messages.

To start off you need to get to your User CP. You can do this of two different ways: First you can click User CP off the navigation bar...

Example:
Image

Or you can click on the Private Messages link on your welcome screen.

Example:
Image

Either way it will get your to your user cp where you need to proceed to click Send New Message from the Control Panel.

Example:
Image

When you click this link you will be send to a new screen like will look like your signature editor page will the few execptions. The first thing you will notice that is different is a box that is at the top of the screen. This box is for you to type the recepient(s) name in. You may have up to five names in this box seperated apart from each other by semicolons (;). Here is an example of the box and of the names.

Example:
Image

Zulu ; CRAZY_JAY ; Nicol3 ; Dudeman. ; Areks

Now, apart from this recipient box and the title text field the rest of the options are the same. There is a standard text editor or whatever your preference is on and the same features as the signature. So, type your message to the user or users of your choice and get ready to send.

Before you send however there are a few other options you can choose to include or exculde. These options are as followed:

Example:
Image

Read Receipt - a read receipt is an attachment to a pm. It allows you to track the message to see if a user has read your message or not.

Save a Copy - this is by default checked and what it does is when you send a message that same message is saved in sent items. So, if you don't want to have to delete your sent items uncheck this option.

Parse Links - This option is a pain in the butt if you are sending a link to someone and they want to copy it. What this option does is it abbreviates the link so it takes up less room. It will put a ... in the middle of the link and follow it up with the link's ending. If you want someone to copy a link I suggest turning this option off.

Disable Smilies - The option does exactly what it says... it doesn't allow smilies to be displayed. I don't know why you wouldn't want smilies to be in a private message but if you don't want them to be displayed just check this option.

Table of Contents
Private Messages
Paperclip

Posts: 840
Joined: Nov 2004
Rep: 500

View Profile
Sep 23, 2006 6:07 PM #15820
Private Messaging
Tracking Messages


Tracking Messages are a way to find out if a user has read your private message or not. This can be used in many ways. Because Read Reciepts are turned off by default, if you click the tracking messages link...

Example:
Image

You won't get anything on the new page. You will just see a text box saying something like, "You are not currently tracking any messages". If you want to track a message however, you must turn on the Read Receipt option when you send a message.

Example:
Image

When you turn on the Read Reciept option, the user who recieves the message will get a pop up window asking for them to confirm the reciept. If they confirm it, then when you check track messages you will see a read confirm and the date when read. If they haven't read it or choose not to confirm the message then you will see unconfirmed or not read.

Example:
Image

Now, you don't have to go to track messages to see if your Read Reciepts are confirmed or unconfirmed, because they are listed under your inbox.

Example:
Image

From there you can following the link to get to the same place as shown in the previous example.

Table of Contents
Private Messages
Paperclip

Posts: 840
Joined: Nov 2004
Rep: 500

View Profile
Sep 23, 2006 6:21 PM #15821
Private Messaging
Creating / Editing Folders


The purpose of creating folders is to be able to better organize messages that you want to keep or to seperate. To create a folder click on the Edit Folders link on the Control Panel of the User CP.

Example:
Image

This will bring you to a new screen with three text fields that can be filled in to create three new folders. Well, you can name your folders whatever you would like but for the guide's purposes i'm just going to name it Saved Items. Here is an example of what the page should look like.

Example:
Image

Now, once that you have created your new folder you can do new things with it. We have discussed the "jump folder" function in the first section that allows you to "jump" between folders and view their contents. With the creation of your custom folder it will also be under that drop down menu.

Example:
Image

You can also move messages you want to keep or seperate by using the Private Messaging Tools at the bottom of the folders.

Example:
Image

If you want to delete your custom folder you do this by going back to the Edit Folders page. You will now see a new section to the page with the option to delete your custom folder by clearing the name of the folder. This will move all the messages in that folder to the inbox.

Example:
Image

Table of Contents
Private Messages
Paperclip

Posts: 840
Joined: Nov 2004
Rep: 500

View Profile
Sep 23, 2006 6:53 PM #15822
3.Subscribed Threads
Subscriptions
How to Subscribe & Unsubscribe


Paperclip

Posts: 840
Joined: Nov 2004
Rep: 500

View Profile
Sep 23, 2006 6:57 PM #15823
Subscriptions
How to Subscribe & Unsubscribe


Subscriptions are used for many different reasons... the most common reason is that you are interested in the thread and you want to see if someone have replied. Though subscriptions are not commonly used at all they still have some uses.

To subscribe to a thread you must first locate a thread you want to subscribe to. Once you have done that click on the Thread tools at the top of the thread. Under the drop down menu you will see the link that says Subscribe to Thread. Click it and you will be sent to a new page.

Example:
Image

The new page will give you two small drop down menu's with options about your subscription.

Example:
Image

The first drop down menu will list options of how you want to be contacted when someone posts. If you choose the first option then you will not have an email ever sent to you if someone replies. The next option will be a pain if you choose it because if the thread becomes popular your inbox will be flooded with emails about people posting in your subscribed thread. The third option is a little more reasonable but not suggested and the final option is recommended if you want to get an email.

The second drop down menu has options about what folder do you want your subscription to be listed under. This step goes with Editing Folders and involves you having created a custom folder.

Example:
Image

If you wish to create a custom folder follow the link under the Control panel and do the exact same thing you did with creating new folders for private messages. You delete the folders the same way as well.

Example:
Image

Once you have specified what folder you want your subscription to go into then hit Submit.

Your Subscribed thread will be listed under List Subscriptions and will be the second thing you see on the new page.

Example:
Image

If you wish to change the way you have subscribed to a thread you can do this by changing the options located at the bottom of that page.

Example:
Image

So, if you wish to change the way you are contacted by replies to a subscribed thread you want to change the last four options listed. If you wish to delete the subscription select delete and go. If you want to move your subscription to a custom folder select Move to Folder and hit go. Most of this stuff is similar to the private messaging options.

Table of Contents
Subscribed Threads
Paperclip

Posts: 840
Joined: Nov 2004
Rep: 500

View Profile
Sep 23, 2006 7:20 PM #15825
4. Miscellaneous
Miscellaneous Options
Miscellaneious Options

Table of Contents
Paperclip

Posts: 840
Joined: Nov 2004
Rep: 500

View Profile
Sep 23, 2006 8:20 PM #15826
Miscellaneous
Miscellaneous Options


Okay, so at first glance there might seem to be four links under Miscellaneous Options, but really there are only three. Event Reminders are tied into the calendar and members are restricted from posting events on the calendar because it was spammed to much on the old forum. So, we are left with three links:

Group Membership
Buddy / Ignore Lists
Attachments

Group Memberships I may not have even put in this guide because you can't join a group. The only group you are apart of is the Portal Users group. If you delete yourself from that group you can no longer be able to upload anything to the portal. This means no competitions or reviews of work.

1. Buddy / Ignore Lists are very useful. I'll go into detail on regarding this. Okay, so you want to add a buddy do you? Well, to do this you need to go to the User CP. By now I hope you know the ways to do this so I don't have to explain myself over again. Once you are in the User CP click on Buddy / Ignore Lists on the Control Panel.

Example:
Image

Because we are adding buddies first we don't need to deal with the right side of this new screen. So, let's consentrate on the left side of the screen. This side of the screen is where you will add the names of the members you want to add to your buddy list. I've given you an example.

Example:
Image

Okay, so in my example i'm adding Polnareff and Nicol3 to my buddy list. It is the same for you. You need to type in the member(s) you want to add and click Update Buddy List.

Now, the buddy list does two things to the members you add. The first thing it does is it adds a + sign to their name when they are on the active users list. The second is that their names are then added on to a list that you can open that has the options to send a message to. An addition to this list is that it also tells you if your buddies are online or not.

To open your buddy list go to Quick Links on the navigation bar. Then click on Open Buddy List.

Example:
Image

Now, that we have covered the left side of the Buddy / Ignore Lists screen it is time we cover the right. The Ignore List is a useful function for people who you don't like. It is very useful for blocking posts of spammers. To use the Ignore Lists do the same as the left side; type the member(s) name that you want to ignore in the text field.

Example:
Image

I used piggypup and fetus who are really the same person. Now, when you click Update Ignore List, any member you have entered into the text field will be blocked from your viewing. You cannot see anything they type in a post, anything they display, and you cannot see images by this user.

Again, this is a very useful feature of this forum.

2. Attachments, the last link that is useful on the Miscellaneous Options, is where you can delete all the files you upload directly to stickpage. You may have noticed that you have a limit on the amount of files you can upload to stickpage. Something like only 1 megabyte of files can be uploaded on your account. Well, this can happen very fast and it is good to know how you can delete the old attachments you don't use anymore so you can free up more space for newer attachments.

To acces your attachments you need to get to the User CP. Do this whatever way you wish and then click on the Attachments link on the Control Panel.

Example:
Image

Once you click on the link you will see any attachments you have made and what thread they are under. If you want to delete them you can to free up space.

Example:
Image

This ends it for the Miscellaneous Options but i'm going to go back and explain how to upload an attachment to make sure new members know how to upload them instead of just knowing how to delete something they don't have yet.

3. Attaching Files

Stickpage allows members to upload one megabyte of files on their server. This service is only available on posts. So in order for you to upload anything you must be making a post.

When you are replying or making a thread / post there are options at the bottom of the page. Once of these options is Attach Files.

Example:
Image

This is where you will upload files direct to stickpage.

There are the usual two ways to upload files to stickpage. Either by browsing and getting the file from your computer or from a URL. Because i've covered both methods in uploading signatures and avatars i'm not going to bother going over it yet again.

Once you have selected your file from either on the computer or from a URL hit upload. The file will then appear in a box when you post.

Table of Contents
Miscellaneous
Paperclip

Posts: 840
Joined: Nov 2004
Rep: 500

View Profile
Sep 23, 2006 9:35 PM #15828
This concludes my rather lengthy guide to the User CP. I hope any new member who had any questions about this is now in perfect understanding. For those members who had no question then I just hope you liked browsing to see what I have been doing for the past week. I can say that I hope I never have to do this type of tutorial again because the screenshots were a pain to do. Thanks for all your patience and let the posting begin!

.:GoddiousAdminious:.
The Tutorial God Returns!
Evolution
2

Posts: 104
Joined: Jul 2006
Rep: 10

View Profile
Sep 24, 2006 7:59 PM #15869
PWNAGE tutorial, altough I already knew most of the stuff in it, it would help people new to vBulletin alot.
woot, first post.
LN3uq
2

Posts: 2,457
Joined: Dec 2004
Rep: 35

View Profile
Sep 26, 2006 1:28 AM #15931
*gasp*

That must have taken you ages to do. Great work!

*reps*
Paperclip

Posts: 840
Joined: Nov 2004
Rep: 500

View Profile
Sep 27, 2006 4:45 PM #15977
Yeah, the guide took a long time to complete.
I did a little bit of the guide everyday and finished a few days ago.
Posting sure is going slow. Maybe that is because it looks like there have been 3 pages of posts. Then again, maybe not.
HBZ
2

Posts: 34
Joined: Jan 2006
Rep: 10

View Profile
Sep 27, 2006 4:51 PM #15979
Holy Moly Paperclip, you got tons of patience XD

Awesome job on the tut really, it brings tears to my eyes.
limpy
Banned

Posts: 11
Joined: Sep 2006
Rep: 10

View Profile
Sep 28, 2006 4:15 AM #16012
Superb tut PaperClip. I learned much I did not know, but not too much.
Scarecrow
2

Posts: 9,168
Joined: Oct 2005
Rep: 10

View Profile
Sep 28, 2006 6:52 AM #16016
= O
Website Version: 1.0.4
© 2025 Max Games. All rights reserved.